Burn your pubkey into NFC tags
- Obtaining NFC Tags
- Writing data
- Read the pubkey
- Security Considerations
- Conclusion
- NFCタグの入手
- データの書き込み
- 読み込み
- 注意
- おわりに
https://i.gyazo.com/4a49364d73ab59c8cbc2fc620825ccf7.gif
(Japanese follows. 日本語はあとに。)
This article is for Day 7 of Nostr (1) Advent Calendar 2023. Yesterday’s article is What is Nosskey? by ocknamo.
When I attend offline meetings, I usually bring a nametag with a QR code printed on it.
With NFC tags as well as QR codes, you can instantly exchange your pubkey by simply holding on smartphones over the NFC tags. It should be a very interesting experience. I hope you all give it a try.
Obtaining NFC Tags
First, you must purchase an NFC tag.
As for the physical shape, there are sticker type, rectangular card type like a credit card, and circular card type like a coin.
Choose tags with NTAG213, NTAG215, or NTAG216 chips. Various types are sold on Amazon and other retailers.
How do I choose?
The physical shape should be chosen based on the occasion of use. If you already have a name tag or know that name tags will be provided at the event, you may want to have sticker-type ones. You may also put the card-type ones in the back of the nameplate (however, if the nameplate is a double-sided one, it may hide the nameplate, in which case the sticker type is more convenient to use).
Writing data
After obtaining an NFC tag, write data to it. Here we will use an application called NFC Tools.
For iPhone, the NFC reader/writer is located on top of the device.
For Android, it varies depending on the model. In the case of Google Pixel, it is located in the center of the back of the device (around G logo).
After launching the application, tap “Write”. Then tap “Add a record”. Select “Custom URL / URI.” The “Enter URI” screen will appear. Here, write “nostr://” followed by the npub public key. In my case, it would be nostr://@darashi You are now ready to go. Tap the button “Write / 76 bytes” and move the tag closer to the reader/writer. It is successful when the display shows that the writing is complete.
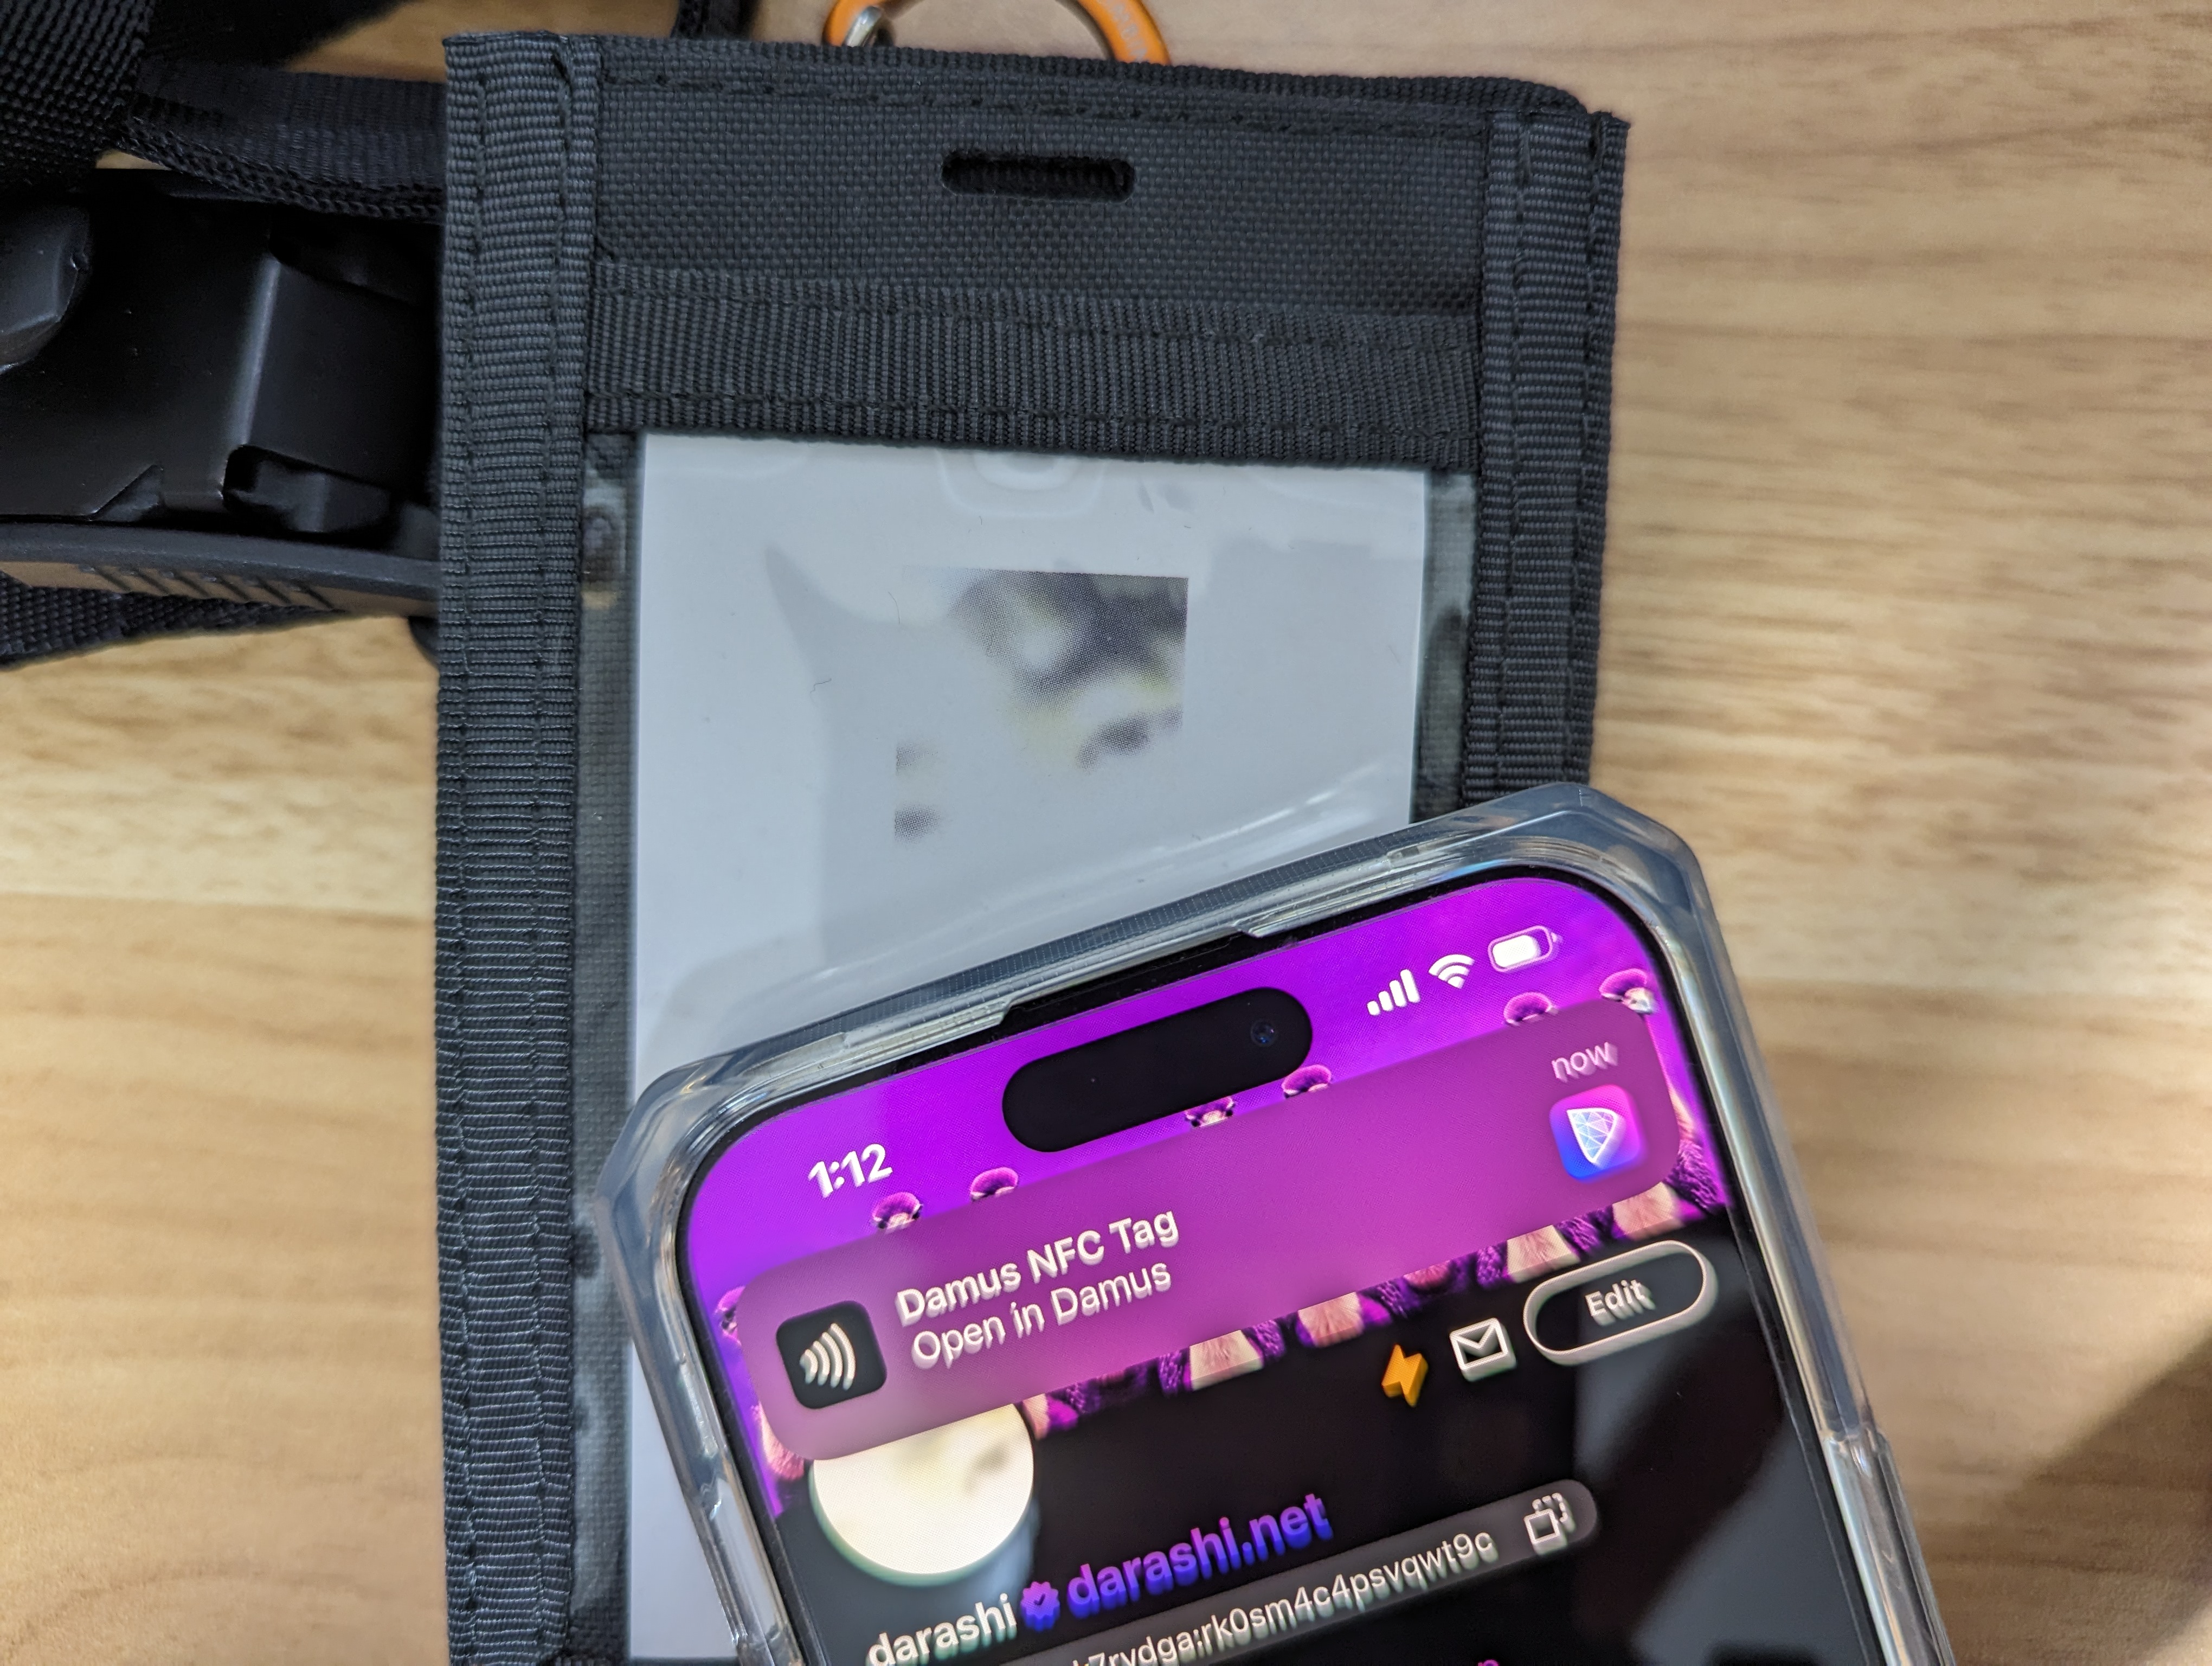
Read the pubkey
Let’s read it: move the NFC tag closer to the reader.
On iOS, a notification should appear at the top of the screen. Tap there and the installed Nostr client should be opened and the user’s screen should appear.
For Android, the Nostr client app should launch as soon as the read is successful; for Android, you may need to quit NFC Tools to make it work.
Security Considerations
Note that anyone can write to your tag in this state. For example, a malicious person could replace it with the public key of another account (or malicious URI).
So it is a good idea to set a password in “Set Password” to restrict writing, or do a “Lock tag” operation to make it permanently impossible to rewrite.
It should also be noted that receiving a pubkey in this manner does not tell us anything more than “the person in front of me claims that this is his/her public key”. It will be necessary to verify by some other method whether that person really owns the private key corresponding to that key.
Conclusion
Why don’t you all take your NFC tags with pubkey burned into them and attend offline meetings? Tomorrow, Shino3’s article will be published. Looking forward to it!
この記事は Nostr (1) Advent Calendar 2023 の7日目の記事です。昨日の記事は ocknamo さんによる Nosskeyってなに? でした。
オフラインミーティングに参加するとき、私はQRコードを印刷した名札を持っていくようにしています。
QRコードだけでなく、NFCタグを使うと、スマートフォンをかざすだけで瞬時に公開鍵を交換できます。とても面白い体験ができると思います。みなさんもやってみてください。
NFCタグの入手
まず NFC タグを購入します。
物理的な形状としては、シール型、クレジットカードのような長方形のカード型、コインのような円形のカード型などが出回っています。
チップの規格としてはNTAG213、NTAG215、NTAG216を搭載しているものを選ぶと良さそうです。Amazonでも様々な種類が売られています。
- サンワサプライ NFCタグ(10枚入り) NXP NTAG213 ホワイト MM-NFCT
- https://www.amazon.co.jp/dp/B00GXSGL5G
- スイッチボット Switchbot W1501000 \[SwitchBot NFCタグ 3枚入り\]
- https://www.yodobashi.com/product/100000001007165740/
- SwitchBot カード
- https://www.amazon.co.jp/dp/B0B2DPWWTC
Switchbot W1501000 はヨドバシカメラ実店舗でも取り扱いがあるので、やや割高ではありますが、たとえば明日オフ会があるなど、急いで入手したい場合にはおすすめです。
どう選ぶ?
物理的な形状は、利用シーンに応じて選ぶとよいでしょう。すでに名札を持っている場合や、イベントで名札が配布されることがわかっている場合は、シール型のものを用意するとよいかもしれません。カード型のものを名札の裏に入れておいても良いでしょう(ただし、名札が両面印刷のものである場合は名札を隠してしまうかもしれません、そういう場合シールのほうが使い勝手がよいです)。
チップは容量と価格のトレードオフです。Nostrの公開鍵はNTAG213に十分収まる長さなので、どれを選んでも問題ありません。
データの書き込み
NFCタグを入手したらそこにデータを書き込みます。ここではNFC Toolsというアプリを使います。
NFCのリーダ・ライタの位置は、iPhoneであればデバイス背面上部にあります。Androidは機種によって異なるようですが、Google Pixel に関して言うと、デバイス背面中央(Gのロゴ部分)にあるようです。
アプリを起動したら「書く」をタップします。続いて「レコードを追加」をタップします。「カスタム URL / URI」を選択します。「URIを入力」の画面が出るので、ここに「nostr://」に続けて npub の公開鍵を書きます。私の場合は「nostr://@darashi」となります。
これで準備完了です。「書き込み / 76 バイト」というボタンをタップし、リーダ・ライタにタグを近づけます。書き込みが完了の表示が出れば成功です。
読み込み
読み込んでみましょう。NFCタグをリーダの位置に近づけます。
iOSの場合は画面上部に通知が出るはずです。そこをタップすると、インストールされているNostrクライアントが起動して、ユーザーの画面が出てくるはずです。
Androidの場合は、読み込みが成功するとすぐにNostrクライアントアプリが起動するはずです。Androidの場合はNFC Toolsを終了させておかないとうまく行かないかもしれません。
注意
この状態のタグには、誰でも書き込みが可能なことに注意してください。たとえば、悪意ある人が別のなりすましアカウントの公開鍵にすり替える、ということが可能です。 「パスワードを設定」でパスワードを設定して書き込みを制限するか、「タグをロック」の操作をして永久に書き換えを不可能にしてしまうのが良いでしょう。
また、この方法では「目の前の人が自分の公開鍵がこれだと主張している」という以上のことがわからないことにも注意が必要です。その人が本当にその鍵に対応する秘密鍵を所有しているのかは、別の方法で検証する必要があるでしょう。
おわりに
みなさんも、pubkeyを焼き込んだNFCタグを持ってオフラインミーティングに参加してみてはいかがでしょうか。明日はしのさんの記事です。楽しみです!
Write a comment